How to Fix a Hole in a Shoe at Home — and Its Real Limits
Wear a favorite pair long enough and it will eventually develop a hole — straight through the sole or the upper, letting gravel and dust in with every step. Patching early is far cheaper than replacing the pair, but a hole is not the same as a tear or a scuff: the repair has to survive every step you take, so it pays to know the limits of DIY.
Find the hole first
- A hole in the outsole or midsole lets water and grit in from below. DIY only makes sense when the hole is small and sits on flat outsole — not on the toe bumper, the edge, or the heel.
- A hole in the upper (canvas, suede, soft leather) is visible and usually at the toe or side panel.
- Holes on the toe, the sole edge or right by the heel sit in the flex and impact zone — home patches there almost always come loose. Skip DIY and go straight to a cobbler.
Sealing a small sole hole with shoe glue
- Clean the area around the hole and let it dry completely.
- Cover the hole with a strip of tape on the inside of the shoe — it gives the glue something to hold and keeps it from running into the footbed.
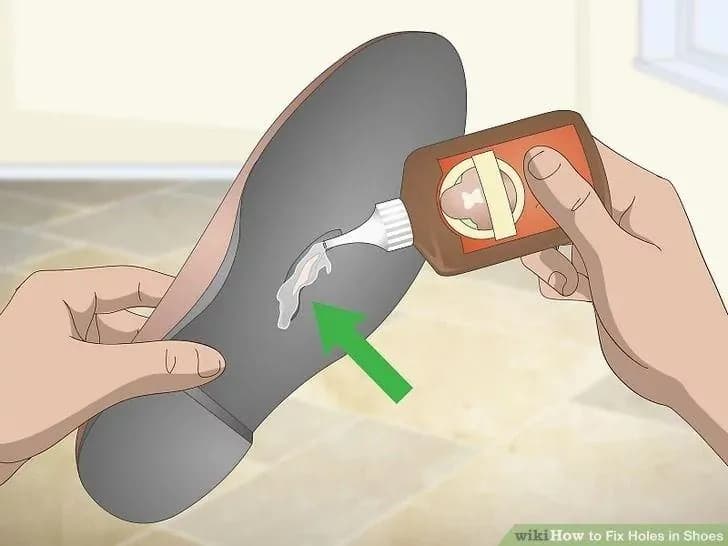
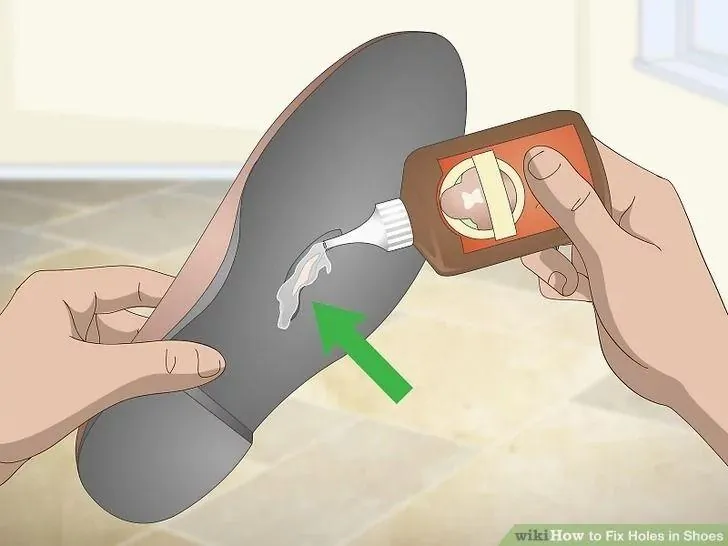
- Squeeze dedicated shoe repair adhesive over the hole from the outside, slightly larger than the hole itself.
- Wait 1–2 minutes until the glue partially sets, then spread it flat and even with a wooden stick.
- Let it cure overnight, then peel the tape off the inside. The cured glue should sit flush.
This works for small to medium holes. The patch is a layer of glue — it will never be as watertight as the original outsole, so do not count on it for heavy rain.
Patching a hole in the upper
For canvas, suede or soft leather uppers:
- Stuff the shoe with clean paper to hold its shape and give you a backing to sew against.
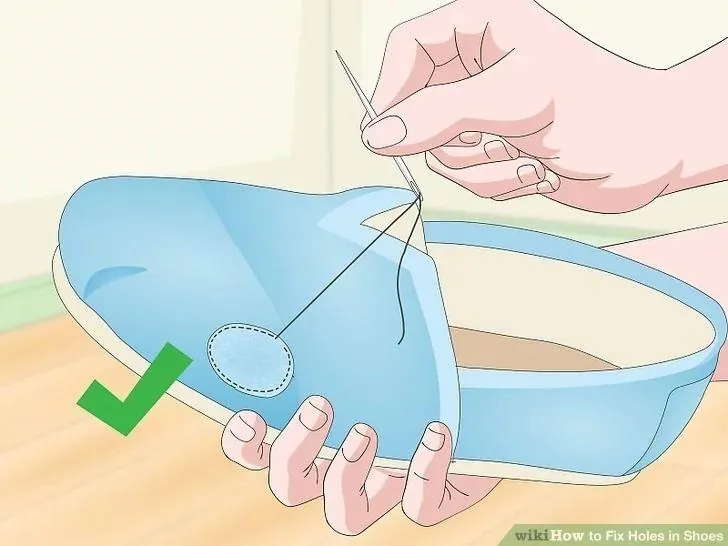
- Cut a patch large enough to cover the whole hole — a hole at the toe needs a patch covering the toe area, not just the hole.
- Pin the patch in place and check that it sits straight.
- Hand-stitch around the edge with even stitches; tie the thread off inside.
Do not use an iron to fuse the patch on suede or leather — heat ruins the surface. A matching fabric patch is the discreet choice; a contrasting one is a deliberate style statement.
The limits of home repair
- A DIY patch lasts a while but will not survive long in the flex and impact zones.
- Large holes, a crumbling midsole, or wear that started from the inside out need more than a surface patch.
- A wide hole in the outsole means the whole sole should be assessed — possibly a full resole, from 550,000 VND (2026 reference).
For a broader view of what is worth repairing, see common shoe problems and how to restore them.
When to send them to EXTRIM
A hole at the toe bumper, sole edge or heel; a large hole in the upper; or a patch that already came loose once — stop there. The shoe repair workshop at EXTRIM does stitched body repairs at 200,000–350,000 VND depending on position and material, toe and heel reglue at 250,000–400,000 VND, with a 2-month repair warranty (2026 reference; final price confirmed after inspection).
👉 Send photos of the hole for a repair assessment
Public cases
Photos in this article illustrate the process — they are not a before–after record with a public case code. EXTRIM does not use illustrative images to promise results for every pair.
Need Professional Attention for Your Item?
EXTRIM provides two-way doorstep courier pickup across Ho Chi Minh City, with up to 80,000 VND off qualifying orders. Service options, final pricing, timing, and any applicable repair warranty are confirmed for each item.